Thursday, April 29, 2010

Healthy Eating: Color and Presentation Matter.

Does the way our food look matter?  It certainly must, in that many foods contain harmful dyes used to add a pop of eye catching color. Cereal, jam, noodles, soup you would be shocked to know what goes into these foods to make them more visually appealing. We truly tend to "eat with our eyes first" but this doesn't have to be a bad thing.  I got to thinking about this today around lunch time...shocking I know.  Growing up my mom always made sure that the dinner plate had a variety of colors on it, which I found quite odd.  Turns out it wasn't some bizarre Norwegian maxim.  In fact, some guy (the director of the UCLA Center for Human Nutrition, no less) even wrote a book called, "What Color Is Your Diet?".  Go mom.  So, we can eat healthier by making sure that our meals are diverse in natural color and we can take a little time on the presentation (even if it is just for ourselves), so that the feast isn't just for our stomach but for eyes as well.

I love to eat this for breakfast or lunch.  Whole wheat toast, Laughing Cow garlic herb cheese, a slice of prosciutto, topped with an egg, sunny side up.
To add some color; avocado, tomato, and basil.

I find that I eat my food slower when it is pretty to look at.  Not surprising in that beauty often causes one to linger.

Tuesday, April 27, 2010

Tree Mural: Part Duex

Hmm, this project has turned into a series of blogs.  Would there even be progression without the blog?  I choose not to go there.  Anyways, I left you with this this last week...

I did add another coat of paint but Steve convinced me to stop there because he liked the textured look of the strokes, saying they were more "tree like" (he is a realist in all facets of life).

I picked out some scrapbooking paper,


printed out a bird template, drew a leaf shape, and traced and cut the hours away.

In the end I decided to use this product called Zots, which is the equivalent of using a hot glue gun.  I am a fan, just don't touch them with your fingers.

I place my birds and leaves one pattern at a time so they were equally distributed on the branches.

I think I am going to need a few more sheet of paper to fill out all the branches but I am basically done with the front of the fireplace.  Steve built a little flower box out of the leftover shelves from this  reclaimed piece of furniture in the playroom.  What's next?  I plan to wrap the leaves around the fireplace and onto the wall, as though they are blowing in the wind (need to paint wall first), and fill my flower box with dollar store flowers.  Looks like the tree mural posts will have to continue.  Mama needs the motivation!

DIY Day @ ASPTL

Thursday, April 22, 2010

In Love With Container Gardening

I think that I am in love.  Container gardening is right up my alley; little to no weeding, color, composition, beautiful pots...dreamy.  My good friend asked me to help translate her aesthetic (which she has done beautifully inside her home) to the outside with some window boxes and pots.  Needless to say, I am learning a lot.


With pots it is important to choose plants with a similar watering schedule.  For example: succulents will mold with too much watering and evergreen trees and shrubs need a lot of water, especially in the beginning...so planting them together can be problematic.  Don't rely solely on flowers to bring in color.  The Tulips in this picture have already lost their petals and soon the Ranunculus will follow but the color contrast of Black Mondo Grass, Coral Bells, and Euphorbia Martinii will remain.


One tip I learned from this month's Sunset was that Tulips and Ranunculus shouldn't be cut back once the flower dies because they continue to store energy for the next year's show.  They can be cut back once the stems and leaves have died.  Sunset recommends overseeding with Cosmos, whose foliage and flowers will help to hide the dying flowers.


Because the boxes are so vibrant we chose simple cream pots and used a more subdued color palette next to the front door.

Originally, we had thought this maple would be pretty by the front door but it was much too big and competed with the planter boxes.  I think they picked perfect place for it; in front of the cream shingles it offers a welcoming pop of color

I am kicking myself for not taking a before picture of this.  The bed was considerably lower then the railway tie and ended abruptly.  I brought the bed up with potting soil and continued it to the end of the path.  I transplanted the existing ground cover and succulents and added river rock to add some texture.  I also planted Lithodra, which is a ground cover with beautiful bright blue flowers.

I have a few more projects that we are working on that I will show in the next couple weeks.  Yes, I am as giddy as a school girl!

Wednesday, April 21, 2010

Chunky Banana Bran Muffins-Must Be Awake to Bake

Had one of those mornings where I couldn't seem to get out of bed.  I blame you, Tempurpedic.
Spent the first 15 minutes like this. 

Finally, when I reached this stage I made Chunky Banana Bran Muffins.  My husband commented as he walked out the door, "Are you backed up?".  Why can't a girl eat bran muffins without facing this ridicule.  I happen to like the way they taste; plus my iron is low and this recipe has lots of molasses in it.  So back off. 

I could just show you this picture and tell you they are delicious.

But honesty prompts me to create a visual reminder to not bake with your eyes partially closed at 7:30am. 

Tuesday, April 20, 2010

My First (and last) Wall Mural

I am two months away from my due date and have entered the nesting period.  Up until this point that has translated into lots gardening.  However, I am finally starting to tackle some indoor projects, the first being Pearl's playroom.  Before painting the walls I decided to address the unused fireplace because I have had a plan for it for some time.

 I always struggle with what to put on the mantle and in the fireplace...and it shows.


 I have always thought it could be a cute focal point in the room but it wasn't until I came across this project that I was truly inspired.


I found a tree shape I liked on Off the Wall.

And borrowed one of Pearl's washable markers to roughly sketch it out.  If you are a perfectionist you could make a transparency of the picture and project it onto the wall to trace.  If you are me, you look at the picture, start drawing, and thank God for washable markers.


I have had this bucket of silver paint for a long time and am so happy that I finally found a use for it.  This is after the first coat and I'm guessing it is going to need several more.  After I am done with the painting I am going to add leaves and birds; either out of vintage wallpaper like the tree from Enfant Terrible or scrapbooking paper...not sure yet.  Other plans I have are for an mirrored owl and flower box in the fireplace.  I will keep you posted!


Friday, April 16, 2010

Plant a Vegetable Garden and Create Your Own "Food Revolution"

I haven't been a faithful watcher of Jaime Oliver's Food Revolution but I happened to tune into one episode where he asked a bunch of elementary school kids to name a bunch of vegetable in their raw form and they simply couldn't do it.  Tomatoes were apples and eggplant got a blank stare.  It was pretty shocking.  Our food has become so severely over processed that there is a disconnect from the garden to the plate.  One way to remedy this is to invite your children into the kitchen, involving them in cooking "real food".  Another way is to plant a vegetable garden and let them help in the responsibilities of planting, tending and harvesting.  I had two of my favorite friends over to help me plant some of our vegetables last week. 
They really took control, I didn't put one plant in the ground!  A week later they are asking if the plants have grown and if they can come over to plant some more.  Imagine how exciting harvesting and cooking with these vegetables is going to be for them.

I made a trellis for my snap peas out of a U shaped bamboo stake and some twine.  You can also use this method with tomatoes, which I'll be sure to show when I plant them.
Until the weather gets a little warmer we stuck with heartier plants like: beets, brussel sprouts, snap peas, leeks and various herbs.

I was warned by several seasoned gardeners that I might have a slug invasion if I planted lettuce in my raised beds.  There are methods to combat this like; planting geraniums next to them (which the slugs tend to favor and fill up on) or creating a copper border (which they apparently have an aversion to).  I opted for planting my lettuce and spinach in a pot (39.00 Costco).

If you live in a more urban environment you can grow all your vegetables in containers as long as you have adequate sunlight.  Even if it is a small pot of herbs it is worthwhile.  The point is that, every time you go out and pick off a sprig and put it in your food you are reminding yourself and your kids, if you have them, that our food comes from somewhere.  And that somewhere isn't from a package!

Thursday, April 15, 2010

Grilled Yogurt Chicken with Cucumber salad and Crispy Fingerling Potatoes

I have reached a milestone whose meaning I have yet to decipher and yet I can feel the weight of its significance.  My mood was lightened, I felt a spring in my step and a slight twitching in the corners of my mouth...and all because the Lilacs in my backyard bloomed.  And the joy brought about by sitting down for a meal with their scent in the air, I digress.  Tried a recipe from the newest Sunset last night and it was delicious.


My addition to the menu

Crispy Fingerling Potatoes:

Preheat your oven with a sheet pan inside at 500 degrees
In bowl toss potatoes with olive oil, sea salt, and fresh oregano
Once preheated, turn oven down to 400 degrees, pour potatoes onto sheet pan, and cook for around 25 minutes or until fork tender.
Toss with feta and fresh flat leaf parsley

What's next? Emotional breakdowns over a Lifetime movie?  A pair of "Not Your Daughters Jeans?"  I am being viciously pursued by 30 and I kind of like it:)


Wednesday, April 14, 2010

Dreaming of Lemonade Weather: $3 Refurbished Tray

I'm back.  After working in our yard in the freezing rain and wind for four days we needed a break from La Casa De Foster, so we headed up to our cabin in the San Juan Islands for some much needed R&R.  Yesterday I got my behind in gear and drove out to Trader Joes to do the grocery shopping and of course had to stop at the thrift store on the way home.  I found this tray for $3 and thought it would be a great for bringing food and drinks outside this summer.  Here is what I did with it.
I lightly sanded all the wood and cleaned it off with a damp rag.

This is the paintable wallpaper that I used in Pearl's room.  I had a little extra leftover so I thought I would use it for the bottom of the tray.  You could use wrapping paper, scrap-booking paper, the point is to use what you already have.  I measured my tray and then cut out my wallpaper.

Here is where I say, "do as I say, not as I do".  I used Craft Bond which was not smart because while it looked great at first, by the time I applied paint and Mod Podge it started to bubble and wrinkle a bit.  I would recommend using Mod Podge so you can smooth it out while it's wet and assure contact between both surfaces.

Next, I painted my tray.  I set the tray on a cake stand so I could rotate and flip it upside down. Paint the edges first so you can set the tray on the wallpaper side to do the outside.

At this point the tray could be finished with a couple layers of Mod Podge but I decided to cut out some fabric I had laying around and arranged it on the tray before I sealed it.  This would also be a great place to use any beautiful cards that you have been given and didn't know what to do with.

Can't wait until it is lemonade weather and I can put it to use!

Tuesday, April 6, 2010

Using Hardscapes in Your Backyard

Steve is on Spring break and so the backyard project continues through the rain and wind.  I want to talk about the importance of hardscapes.  While it is much more fun to think about beautiful plants, you will save yourself a lot of time and money if you carefully define the spaces in your backyard.  We decided to use pea gravel and drain rock because it creates varied texture and will save us from a huge lawn that needs constant watering and garden beds that need constant weeding.

We found clean bagged topsoil for free on Craig's List, now we just need to fill the top with organic soil to grow our veggies in.  We spent about $30.00 on wood to encase the bricks.  They are secured by wooden stakes that will be covered with drain rock.


To break up the drain rock I am going to make a rounded raised bed and plant low maintenance ornamental grasses and ground cover with some flowers to add color.
For this area of the yard we are using lots of right angles to create the illusion of a puzzle with pieces of grass, gravel, brick and dirt.


Until we have finished all the hardscaping I have promised myself that I won't plant amongst the mess of the yard.  However, there is no reason not to fill up my pots with hearty plants that add beauty to my patio and can be transplanted in my yard later.  I love succulents, burgundy festival grass, Euphorbia martinii, auburn sedge, plum pudding coral bells, and ground cover like Sedum Limelight.
Our patio is in terrible shape and while we hemmed and hawed about tearing it up and laying pavers, it was just too expensive of an undertaking.  Instead we invested in this beautiful outdoor carpet made from polypropylene which is mold, fade, and water resistant.  At almost 8x11 feet it is large enough to cover most of our patio.  Overstock has a great selection of these rugs in all sizes and colors and the best part is that the shipping is always 2.50!

Planing your space ahead of time will give a canvas that is beautiful on it's own and will be enhanced by what you plant on it.


DIY Day @ ASPTL

Monday, April 5, 2010

Tips For Last Minute Entertaining

My poor Aunt got the flu and my parents are remodeling their bathroom so, at the last minute Easter was moved to our house.  I am always worried that the house is too small but yesterday I was reminded that sometimes the layout is more important than the size.  Even with 20 people it didn't feel cramped.  Here are some tips, musings and recipes that can help to get you through any last minute soiree.
Create spaces that are comfortable not just beautiful.  I pull the chairs out from my dining room table and scatter them about my house to create conversation areas.  For more sitting room I put floor pillows on my fireplace hearth and a tray on the ottoman for drinks.  Thrift stores are an excellent place to find folding chairs and tables.  We keep ours under the house and are always surprised at how often we end up getting them out. After I have defined the space, I fill in the room with flower arrangements, candles, and decorations.


In our family Easter brunch is a potluck.  If you are having people over last minute you should never be afraid to ask them to bring something.  This has been a hard thing for me to learn in that I come from a family of master entertainers who can easily pull of the whole show solo.  Create separate spaces for food and drinks.  I like to use a metal tub for beverages and put all my glasses, desserts, coffee and tea on a table next to it.  For the buffet table I stack plates, put silverware in a vase, and clear the runway for all the yummy food.

 
I can't tell you how many beautiful bouquets of flowers that were brought as hostess gifts. My mother-in-law gave me the cutest small potted daffodils.  I took a cloth napkin and secured it around the pot with a rubber band, then I tied a bow around the whole thing with twine.  The best part is that I can plant them in my yard and enjoy them again next year.


Make ahead desserts.  Because I has a days notice I was able to make these two fabulous desserts; Bacardi Rum Cake and Lemon Shortbread Cheesecake.  I love going to bed knowing that I won't have to bake in the morning.  After we came home from church, all I had to do was slice the strawberries for the garnish on my cheesecake.
**A tip for the rum cake.  Before you take the cake out of the pan and glaze it, I like to poke it with a chopstick on the underside and pour about half of the glaze on.  I let it soak for about 1/2 hour before I turn it back over and brush on the glaze.  So good for breakfast the next morning.

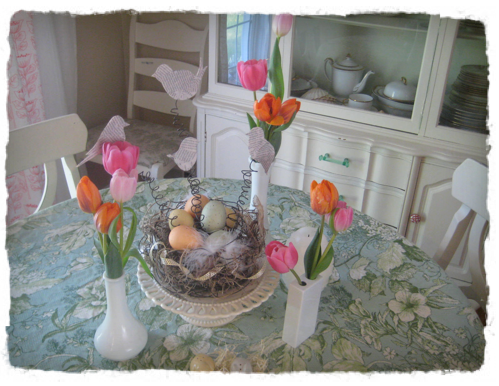
The best part about entertaining is that I get to enjoy all the beautiful flowers long after the guests have left!

Thursday, April 1, 2010

Make It Work.

Awhile back I did a little tutorial on our headboard.  
But with a 2 year old and another one on the way in June we have finally decided to take the plunge and get a king size bed.  Which means that we have to change the configuration of our room.  We decided to do this before the bed arrives so everything is clean and organized. But I couldn't let go of my sticks...because...they make me feel like I am sleeping amongst the trees.  I admit that I am a little bit granola.

So we moved the dresser in front of the sticks (I know it looks like a buffet table...it is).  Now I can go to sleep looking at them.

But there is a problem.
With our bed under the window the metal blinds which, I have always detested, are all the more troubling.  I am on the hunt for some fabric that will cover the blinds and offer the illusion of a headboard.  I am thinking of something chocolate brown and cream but as I will be purchasing this material at a thrift store, I have learned to not be too specific with my musings.


As always, I will keep you updated.  Please send me any ideas or inspiration you might have to solve this problem.

  © Blogger templates Newspaper by Ourblogtemplates.com 2008

Back to TOP